
One of my favorite cool weather projects is cold smoking cheese. Every fall I get many requests from friends and co-workers to purchase smoked cheese for gifts and Holiday party appetizers.
There are several ways to generate cold smoke and I will mention a few in this blog. This really must be done in cool weather or the cheese will sweat or even melt in the ambient outdoor temp.
One of THE most important food safety concerns is to use very clean grates. The cold smoker will not generate nearly enough heat to kill any germs hanging out on the grates. Either purchase some inexpensive clean grates dedicated only for cold smoking, or run your grates through the sanitary cycle of your dishwasher. Wipe carefully with a germ-killing wipe (like Clorox), and rinse thoroughly.
I try to find cheese on sale at the grocery store or purchase at Sam’s or Walmart. I look for large blocks and cut them to smaller pieces for smoking, to get more surface area for smoke exposure.

The simplest and most basic cold smoker is homemade and has been dubbed the “Caveman” technique. I first learned about it on the original BGE Forum in a post by my friend Jody Jones (aka “Firetruck”).
Two purchases are necessary – a 15oz can of beans (beans eaten, paper removed, cleaned well and top hinged) and an inexpensive ($8-$10) soldering iron (local hardware store).
Remove both grids, any lump charcoal, and all the ash from the Egg. Fill the can with dry wood chips (any ‘flavors’ will work and I usually mix them, but be sure to include either cherry or maple wood chips because they tend to add a little darker color to the cheese). Insert the soldering iron into the can of chips and lay it in the bottom of the Egg, threading the cord out through the open bottom vent.


Place cheese on grid(s) (multiple grids if you have them). Close the bottom vent to about 1 inch open. Plug in the soldering iron and put the slightly opened Daisy Wheel (DW) on top. (In a few minutes you should see whiffs of smoke easing out through the holes in the DW).

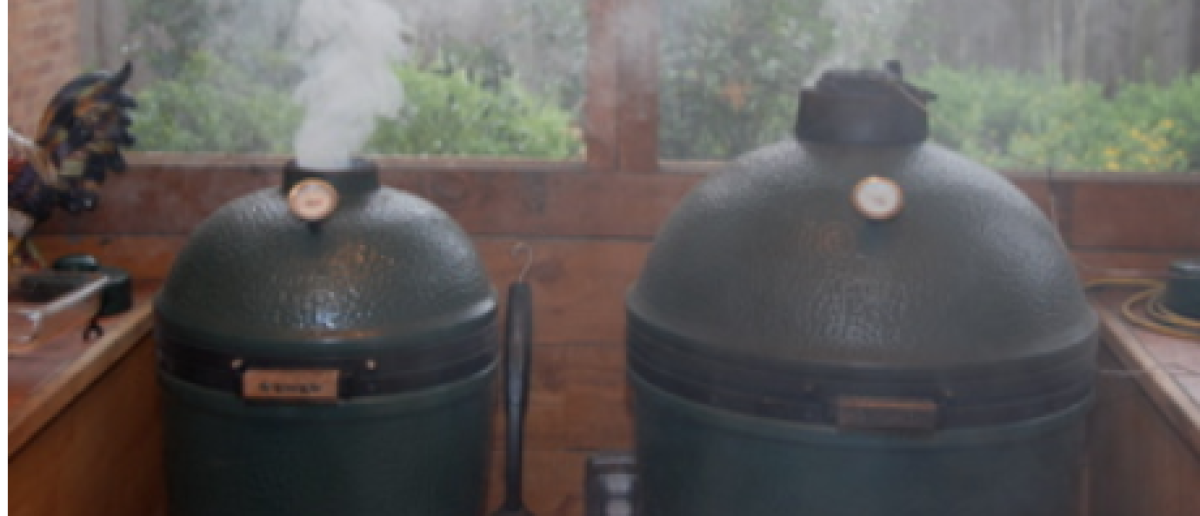
One can of chips will usually generate smoke for about 90 minutes. I usually shake the soldering iron (by the cord at the bottom vent) about halfway through smoking to bring some fresh chips in contact with the heating element of the iron. This process will generate very little increase in temp compared to the outside ambient temp, as shown by this picture:

I have found that 90 minutes of smoke is all that is needed to get the flavor I desire. Others have smoked for longer times (reloading the can), but it’s all about personal preference.


IMPORTANT!
The freshly smoked cheese MUST rest (mellow) for at least a week to let the smoke flavor penetrate into the cheese. I put it in ziplock bags and into the fridge for a week before cutting into 4-5 oz pieces that I vacuum seal. One can cut into these pieces and vacuum seal immediately, but be sure to put the date on them and let them rest a week before serving. When vacuum sealed, they will keep a few months without molding.


Other methods of generating cold smoke are the Cold Smoke III (uses wood chips):


And the Cold Smoke Generator from ProQ (uses sawdust):

I hope this “tutorial” on smoking cheese has been helpful. Actually, as you can deduce from the pictures, this “Caveman” technique can be used with any charcoal or gas grill. One could even use a cardboard box!
Enjoy!