Grilled Cajun Cobia (lemon fish)

I recently acquired some fresh cobia (also known as lemon fish) from my local fish monger (Duggan’s Fish Truck). Having never grilled cobia, I obtained this recipe from the owner, John Lester.

Cobia has a firm, white flesh and since the filets are rather thick it tolerates the direct heat from the grill without drying out.

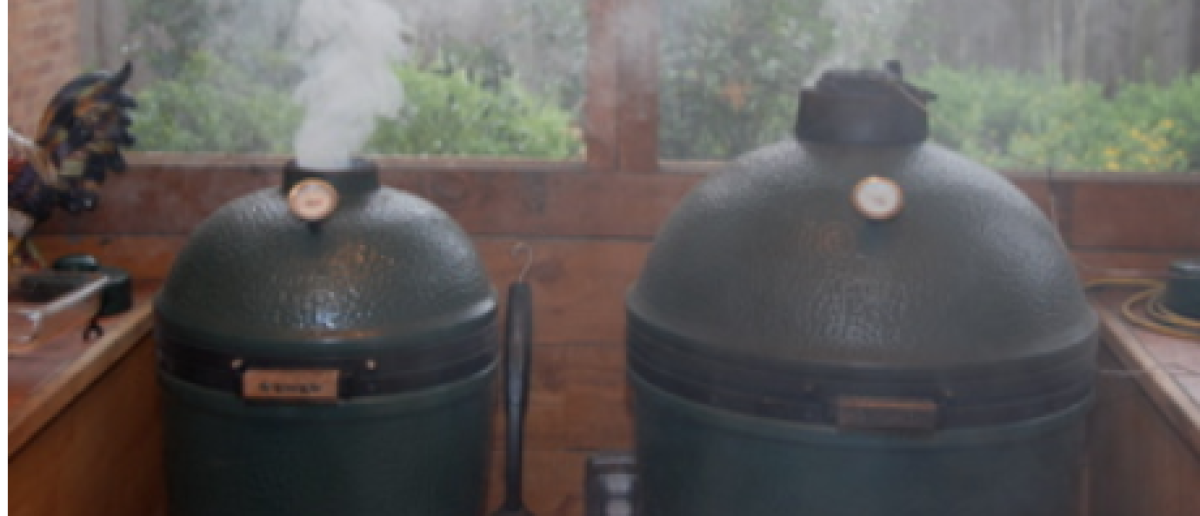
I got the large BGE to about 350-400* dome temperature with inverted Grill Grates elevated on an adjustable rig, creating a griddle-like surface (to read about or purchase on Amazon, click on the link: Grill Grates ).

I coated the fish on both sides with olive oil, then applied a light coating of Cavender’s Greek Seasoning, followed by a light coating of Tony Chachere’s Creole Seasoning. Then I finished with a layer of Smoked Paprika.
IMG_2920

I generously swabbed the Grill Grates with a rag soaked in vegetable oil, then placed the fish on the griddle. I flipped it every 2 minutes until the internal temp registered about 120*.
IMG_2922 IMG_2923


The total cook time was about 8-9 minutes. I rested it for about 5 minutes before plating with Janeva’s Asian green beans and a green salad with home-grown gold and red cherry tomatoes.

IMG_2925

Note: I was a little too generous with the Cavender’s and Tony’s, so the fish came out looking great, but tasting definitely too salty. I strongly recommend being very careful with those 2 seasonings since they both have a good deal of salt.


Enjoy!
Misippi Egger
(Clark Ethridge)

**********

Serves 2

Ingredients:
1# fresh cobia (lemon fish) filet(s), preferably 1.5-2 in thick
Cavender’s All Purpose Greek Seasoning
Tony Chachere’s Creole Seasoning
Olive oil
Smoked paprika (regular is ok)

Instructions:
(1) Prepare grill for an elevated, direct cook at 350-400* dome temp. Use a griddle, inverted Grill Grates, a vegetable grate or even a cast iron skillet.
(2) Coat fish on all sides with olive oil, then lightly sprinkle both sides with the Cavender’s, the Tony’s and the smoked paprika.
(3) Generously swab the cooking surface with a rag or paper towel soaked in vegetable oil before adding the filet(s). Using a spatula, flip the fish after 2 minutes. Continue to flip every 2 minutes to prevent too much char on either side.
(4) Remove from the grill when the internal temp reads about 120*. Total cook time for a filet 1.5-2 inches thick will be about 8 minutes.
(5) Cover and rest about 5 minutes to let the juices redistribute, then serve.
Sea Scallops

IMG_2373

This is a hard-to-beat dinner for those of us who love scallops! I buy dry-packed scallops, which are a better choice than wet-packed ones, since the wet ones have more water content making it harder to get a good sear. Locally I always purchase my scallops from John & Sheila Lester at Duggan’s Seafood Truck (in the DeVille Plaza parking lot – Thursdays and Fridays only). They are fresh & dry-packed, but are kinda pricey (around $20 lb), so you may not want to feed a crowd with these. 🙂 These scallops are so fresh that if vacuum-sealed and frozen, they taste fresh even months to years later when thawed and cooked (not recommended, but sometimes things get found in the freezer – actually, the ones in the picture had October 2014 date on them).

The key to a good sear is a very dry scallop, so be obsessive about patting them dry on all sides with a paper towel before searing! Butter makes for a good sear, but for anyone avoiding butter, extra virgin olive oil (EVOO) works as well.  All fresh scallops need for seasoning is a light sprinkle of salt and fresh ground black pepper – one doesn’t want to overshadow their natural sweet taste.

I use a dry ceramic skillet over a medium-hot burner (a flick of water should quickly evaporate), but any non-coated heavy skillet will work. One can either brush the scallops with melted butter (or EVOO), then salt & pepper before searing, or add a small amount of butter (EVOO) in the skillet and add the S&P while they cook.

IMG_2372

Place the scallops in the hot skillet spaced evenly apart (do not crowd – try to leave a ‘clean’ spot to flip each one for searing the opposite side. If the first scallop doesn’t sizzle when placed in the skillet, wait a little longer for the skillet to get hotter. After about 2 minutes lift with tongs or a thin spatula. If they resist, give them another 30 sec and try again – they should lift easily when the sear is done. Flip to a fresh spot and sear another 2-3 minutes. You want the center barely opaque – DO NOT OVERCOOK or they will get rubbery. Better to be a little on the rare side (they will continue to cook after removed from the skillet). If you have an instant read thermometer, they are done at 120* (minimum) to 140*.

Important note about scallops: They cook so quickly, all side dishes should be done and the table set before the scallops are seared! In the picture below they were served with rutabaga fries and sautéed Asian green beans.

IMG_2373

Enjoy!!

Misippi Egger
(Clark Ethridge)

*********

Serves 2

Ingredients
1 pound dry-packed scallops
1 T melted butter or EVOO
Salt & Pepper to taste

Instructions:
(1) Remove the tough white ‘foot’ from each scallop (if present).
(2) Pat scallops very dry with a paper towel, then brush both sides of each scallop with melted butter (or EVOO) and add a light coating of salt & pepper. (Alternative is to add the butter or EVOO to the heating skillet).
(3) When a heavy gauge, non-coated skillet is ready over a medium-hot burner (a drop of water quickly evaporates), place each scallop in the skillet, spaced wide enough apart to be able to flip them to a ‘clean’ spot.
(4) After 2 minutes flip them with tongs of a thin spatula. If they don’t come loose easily, give them another 30 seconds or so before flipping. Flip to a clean spot in the skillet and sear another 2-3 minutes, until the center is barely opaque – DO NOT OVERCOOK. It’s better to be on the undercooked side – they will cook a little more after being removed from the skillet.
(5) Plate and serve immediately.

Kodiak River Salmon

IMG_2287

There are many ways to grill salmon. Once I developed this recipe/technique, Jana won’t allow me to experiment with any other recipes. This is her favorite and she says “It is perfect. Don’t change it”.

I realize many of you like marinated and/or glazed salmon, cedar-planked salmon, BBQ salmon, etc., and those are all good, but this will be about our “go to” salmon recipe – Kodiak River Salmon. (Note: I will blog about smoked salmon (cold and hot) on another day).

First and foremost, you need a nice, fresh piece of salmon. If it ‘smells’, it’s probably not fresh! I buy my salmon from Duggan’s Seafood in Jackson (truck parked every Thursday and Friday in the DeVille Plaza parking lot, near CVS building). This salmon comes from the cold, Nova Scotia area and is raised in huge, offshore deep-water farms. We prefer skin-on filets – the skin protects the filets from overcooking and the crispy skin is a treat!

Note: If you purchase a whole filet, you should cut the thin belly piece off so it doesn’t over cook, giving you a nice, evenly thick center piece. We save those belly pieces (called Toro) and cook them for appetizers – they are delicious!

This is a 1 pound center-cut filet piece drizzled with a small amount of olive oil and liberally seasoned with Big Green Egg “Kodiak River” seasoning. This seasoning can be purchased at Madison Fireplace & Patio in Madison, MS or at your local egg dealer. The pieces of Toro have a light coating of Kodiak River.

Salmon filet and pieces of Toro seasoned

We had torrential rains all day (the lake is coming over our seawall and pier) and since my Mini Egg is under the porch, it got the nomination tonight. I prepared it for a direct cook at 400-450* dome temp.
400-450*

I carefully scraped the hot grid clean and to further protect the fish from sticking, I swabbed the grid with a small rag soaked in vegetable oil.
IMG_2283

I placed the filet and the pieces of Toro flesh down on the oiled grid, then closed the dome for 2 to 2 1/2 minutes.

IMG_2286

I used a spatula to flip all the pieces, putting the skin down on the grid. (The spatula works better on the tender salmon filet because it will fall apart when using tongs — trust me)!
IMG_2287

After about another minute, I removed the Toro pieces and we ‘dug in’ to these very tasty (high fat content) appetizers.
IMG_2288

When the filet reached 120-130* internal temperature, I removed it from the grill. I always try to let it rest, covered for a few minutes, but that doesn’t always happen!
IMG_2289

I divided this filet lengthwise into 2 servings and plated with roasted bacon & brussel sprouts and roasted chayote squash.
IMG_2290

This technique is great for a quick weeknight meal. The salmon has a nice crust from the rub and the flesh-down sear, but it is flaky and juicy inside.

Try it – it might become your only salmon recipe also!

Addendum:  Weeknight cook: 1# salmon filet plus an appetizer piece of Toro from Duggan’s fish truck. Kodiak River rub plus a light dusting of sea salt. 450* on Grill Grates -( Buy at Amazon  ):
Kodiak River SalmonDone at 120* internal temp. Plated over pan-roasted Brussel sprouts, mushrooms and bacon:
IMG_2761

**********

Enjoy!
Clark
(Misippi Egger)

Serves 2                   Prep and cook time: 30 min.

Ingredients:
1 lb fresh salmon filet, skin on
Olive oil
Big Green Egg Kodiak River rub

Instructions:
Prepare Egg for a 400-450* direct cook
Clean salmon filet, trim off (and save) thin belly piece to get a filet of even thickness. Drizzle a light coating of olive oil and spread it around (to hold the rub better). Liberally coat the filet with the rub and allow it to ‘melt’ onto the filet for 10-15 minutes.
Clean the hot grid carefully and swab with a rag or paper towel soaked in vegetable oil. Lay the filet and any Toro pieces on the grid – skin down.
After 2-2.5 minutes, using a spatula, flip the filet and Toro so the skin side is on the grid.
Remove any Toro pieces after another minute and continue to let the filet cook until it reaches 120-130* internal temp.
Cover and rest for 5-8 minutes, then serve.

Butter-crusted Sea Bass

IMG_2260

I learned to cook sea bass in a convection oven from my friends and colleagues Mike West and Steve Stephenson – simple preparation at 425* for 22 minutes (thick filet). It’s a great recipe, but of course I just had to try it on my Egg.

I patted the filets dry, then brushed lightly with melted butter and seasoned with salt and pepper.
IMG_2254

I set up my BGE for an indirect cook at 450-500*. I inverted my Grill Grates (available at Madison Fireplace & Patio and many local dealers or at Amazon – Grill Grates), creating a flat, griddle-like surface. I sprayed the griddle with Pam and put the filets on (there was a huge flare-up from the Pam dripping onto the indirect piece, but I snuffed it out by briefly closing the dome with the rain cap on top).
IMG_2257

After about 6 minutes, I flipped them to prevent burning, and they were done in a total of about 10-12 minutes.
IMG_2259

The sea bass filets were plated with roasted broccoli from my garden and saute’ed garlic spinach plus a nice glass of merlot. The fish had a great crust (which the oven recipe doesn’t produce) and a juicy, flaky center. I will definitely be cooking it this way in our future!
IMG_2260

Addendum (5/19/16): Slight change in recipe tonight: Added a light sprinkling of lemon pepper and granulated garlic to one side of each filet. Swabbed Grill Grates with vegetable oil and cooked at BGE dome temp of 400*). Pic below:
Sea Bass 5:16
Serves 2

Ingredients:
2 fresh sea bass filets, about 2 inches thick
1/4 stick butter, melted
Salt and ground black pepper, to taste
High-temp, nonstick spray product

Instructions:
(1) Prepare the Egg for a 450-500* elevated, indirect cook. Invert Grill Grates (or use some other griddle-like accessory) and place on the grid. 
(2) Pat the filets dry and lightly brush both sides with the melted butter. Season with salt and freshly ground black pepper.
(3) Spray the surface with a high-temp, non-stick product (be careful of flare-ups).
(4) Place the filets on the surface and flip after about 6 minutes. They should be ready in another 5-6 minutes (one can check the internal temp with an instant-read thermometer if desired).
(5) Rest under foil for 5-8 minutes before serving.