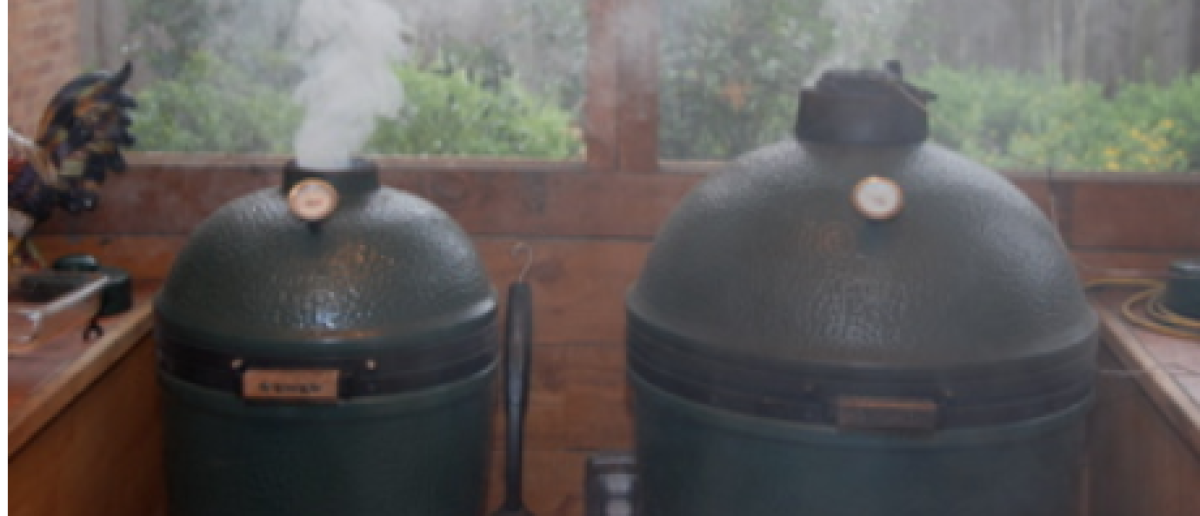
A site for sharing recipes, tips and techniques centered around my Big Green Egg (BGE). I will also discuss curing & aging meats as well as sous vide cooks.
I saw these posted in BBQ Forums and on Facebook pages, so I decided to give it a go. It took a few “trial runs” to work out the missing details in the recipes I found, but I’m confident this recipe is a winner!
With my first trial I used boneless, skinless chicken breasts, but they were on the dry side, so at Jana’s suggestion, I turned to boneless, skinless thighs – much better! I bought a multipack at Sam’s Club, which has 3 thighs per pack, so I could use what I needed and freeze the rest.
Cut the jalapeños in half and remove the seeds and veins. Mix together sharp cheddar and a white cheese together, then fill each jalapeño half with the cheese mixture.
Place a gallon freezer bag over the each thigh and pound it to about 1/4-3/8 inch thickness (one can use a mallet or a heavy, thick glass). Trim the edges to get them even and season both sides with a rub.
Place a small amount of the cheese mixture along the edge of a thigh, carefully flip the cheese-filled jalapeño half over the row of cheese, then roll it up in the chicken filet. Now wrap two pieces of bacon around the roll and secure with toothpicks.
Cover the bacon with more of the seasoning. These rolls can be cooked immediately, or covered and kept in a refrigerator until ready to cook – even overnight.
Prepare the BGE for an elevated, direct 375* cook (by being higher above the coals, the flare-up from the dripping bacon is minimized). Optionally, an indirect cook would work, maybe at a slightly higher price.
Place the bombs in BGE, cook for 30 minutes, then turn and re-slather with BBQ sauce. Cook for about 15 min more or until chicken is 170-180*.
Take off, remove tooth picks, slice into rounds and enjoy!!!!
Enjoy,
Misippi Egger
(Clark Ethridge)
**********
Makes 6 bombs / 24 slices
Ingredients: 6 boneless, skinless chicken thighs 3 jalapeno peppers, halved and de-seeded 1 cup of cheese (1/2 c each of shredded cheddar &/or Monterey Jack) 12 slices of bacon 12 toothpicks (soak in water for 15 min to reduce burning) Favorite chicken rub or seasoning Favorite BBQ sauce
Instructions:
Prep: (1) Cover a chicken thigh with a freezer-style ziplock bag, then pound to about 1/4-3/8 inch thick. Trim up evenly and season both sides with salt, pepper and/or bbq rub. Repeat with the rest of the thighs. (2) Cut the jalapeños in half lengthwise and remove the seeds and ribs. (3) Mix cheeses…fill each half jalapeño with a heaping mound of cheese mixture and put a small amount of the mixture on the edge of the thigh. (4) Carefully place the stuffed jalapeño half on the edge of the breast, upside down onto the row of cheese, and wrap it into a roll. (6) Wrap 2 slices of bacon around the roll and secure with 2 toothpicks (soak the tooth picks in water for 15 min to prevent them from burning)…slather the breast with BBQ sauce.
Grill: (1) Prepare the BGE for an elevated, direct at 350-375* dome temperature (or can cook indirect at about 400*). (2) Place bombs in BGE…cook for 30 minutes…then turn and re-slather with BBQ sauce…cook for about 15 min more or until chicken is 170-180*…take off, remove tooth picks, slice into rounds (about 4 rounds per roll) and enjoy!!!!
Tonight we had some large skin-on, bone-in chicken thighs that needed cooking. Naturally, the BGE gets the call! I wanted a decent smoke flavor and a seasoning with some depth.
I lightly coated them with some olive oil, then seasoned both sides with Mike’s All Purpose Seasoning (Spicy Recipe). I purchased this a while back from a vendor at the Livingston Farmers’ Market, yet I had only used it a time or two. (Website for Mike’s – http://www.mikesseaonings.com ).
Egg set-up:In the past I have used both indirect & direct cooks for chicken. The indirect cook allows using a high temp, but it is difficult to get a crispy skin (elevated, indirect helps). With a hot, direct cook, one gets crispy skin, but at the risk of flare-ups that often give black, charred skin instead. The set-up from my pork chop cook yesterday gave me an idea for a new technique. Two Grill Grate panels were resting on the lower level of my Adjustable Rig (AR), about 4-5 inches below the top of the AR, on which the BGE grid was positioned. I thought this would give a pseudo, or false indirect cook since the Grill Grates would block most of the direct heat from the lump (they have multiple holes in them to let drippings fall through without flaring up), but they would emit considerable heat for cooking the thighs from underneath.
Adjustable Rig with Grill Grates on the lowest level and the BGE grid on top . (Buy Grill Grates on Amazon – Grill Grates ).
On the way home from work I heard an ad for a great BBQ restaurant saying they cook with a combination of hickory and pecan. I thought – why not? After I got a clean, 350* fire burning, I added 2 small chunks of hickory and 2 handfuls of pecan chips (all dry). After the heavy white, acrid smoke burned off, I placed the thighs, skin up, on the grid. I was amazed at the great color on them with the first check, when I was inserting a Maverick E-732 wireless, continuous-read thermometer. (Buy at Amazon – Maverick E-732 ).
When the internal temp reached about 145-150*, I removed the thighs and the grid. I then seared them on the Grill Grates for 2 minutes on each side. Final temp was 165-180*, depending on the size of the thigh.
They were juicy, had a great smoke flavor, and the Mike’s Seasoning really worked well. It met Jana’s approval and was served with black rice, pan-roasted broccoli florets, a salad and Asian dipping sauce.
Instructions: (1) Lightly coat both sides of the thighs with olive oil, then generously apply the rub or seasoning of choice. (2) Prepare a fire at 350-400* and add hickory and pecan chunks or chips. When heavy white smoke clears one can begin the cook. (3) Indirect technique – works better if one can create an elevated cooking surface, as the heat coming from the ceramic dome will help cook the chicken faster and crisp up the skin. With indirect, I will sometimes get the dome temp closer to 500*. (4) Direct technique – build a smaller fire (less lump) and try to elevate the grid as far from the lump as possible. This will allow a hotter fire (400-500*), but less flare-ups since the distance to the lump is increased. Turn thighs frequently to prevent excessive charring of the skin. (5) Combo technique – begin cook indirect and then use a direct sear when the internal temp reaches about 150*.
You know how good the smoked pulled chicken is in a BBQ joint or how tender the rotisserie chickens are at the local grocery store? I have been unsuccessful in achieving these kinds of results when roasting chickens on my BGE. I’m not saying I don’t roast great chickens, just not easily pulled or “fall apart tender”. So I bought 4 whole chickens at the grocery store and started developing a plan…….
I wanted to cook them low & slow to get a good smoked flavor in addition to making them very tender. My plan was also to place roasted chickens in the freezer for future meals. At 300-350*, most whole chickens are usually done in 45-60 minutes, but I wanted to cook these at 180* or so for a longer time.
To be able to cook all four, I used the chickens (still in their packaging) to help determine the fit on the Egg and I came up with a plan using products from the The Ceramic Grill Store. After loading the large Egg with lump and apple chunks plus apple and cherry chips, I placed a ‘spider‘ on the fire ring. On that (about 2″ below the fire ring), I placed a 13″ BGE pizza stone as my indirect piece. I then put a rectangular, foiled drip pan on a ‘slide guide’ on the bottom level of the ‘Adjustable Rig (AR)‘, with an oval grid on a slide guide just above the drip pan. The ‘rig extender‘ fit on top of the AR with the second oval grid on that.
While the Egg was coming up to temp, I put 4 different rubs on the chickens – Rebel Rub (local), Cluck and Squeal’s All Purpose rub, Dizzy Pig’s Shaking the Tree rub, and Gunpowder (a new rub I got in a “swap” with a neighbor who reads this blog). The chickens were placed on the BGE, after it had been stabilized by my DigiQ controller at about 180*(with the stone, drip pan and grids inside).
I ran into issues when my controller would not maintain the 180* grid temp, where it was set. I suspect this was related to the need to replace my ‘leaky’ gaskets. The grid temp crept up to 240-260* despite almost completely closing the top vents. After about 2 hours (chicken internal temp at about 140*), I turned off the DigiQ, barely cracked open the daisy wheel and left it alone for about 2 more hours. The grid temp drifted down to 210*, so I turned it back on and it stayed in the 210-225* range for the balance of the cook. When the thigh temp reached 180*, I removed all four chickens – a total cook time of 8 hours.
The ones in the picture below were on the top rack and the skin got a little more crispy than the bottom rack (note to self – rotate the racks at least once in the future so all four get exposure to the heat coming off the dome onto the top rack).
Bottom rack – the left one had the “Gunpowder” rub (which ‘looks’ like gunpowder).
After resting on a cooling rack, then spending the night in the refrigerator, I cut them into halves, vacuum-sealed and froze for future meals. We did eat the first one, which happened to be the “Rebel Rub” one, and it was tender, juicy and flavorful. They all had a prominent (not overbearing) smoky aroma! Success!
This is a great way to cook several meals in one smoke session, if one has the accessories to create a multilevel cook. This can also be done with fire bricks separating the two grids or with other brands of multilevel grids.
Instructions: (1) Remove the neck and other parts from inside the chicken cavity and rinse well. (2) Drizzle olive oil on the outside of the chicken and spread around to cover all areas to help the rub stick. (3) Liberally cover the outside of the chicken with the rub, as well as inside the cavity. (4) Prepare the grill for a 180-200* indirect cook with a drip pan to catch the considerable fat that will be rendered. Use large amount of fruit wood chunks and/or chips (cherry or maple will help enhance the skin coloring). (5) Roast slowly until the internal temperature of the thigh reaches 180-200*. Remove and serve immediately or allow to cool before cutting up
I’ve previously blogged about a simple turkey recipe (Herbes de Provence Turkey). This post will link readers to my absolute favorite turkey recipe – the “Mad Max” Turkey. My good friend, Max Rosen, whom I initially met on the original BGE Forum is well known by Eggheads who have participated on Forums, Facebook BGE pages and attended Egg Fests. He has developed this fantastic turkey recipe and openly shares it with fellow cooks around Thanksgiving every year (in the past he has actually posted his phone number (hotline) where we could call for help if we didn’t understand something). It is not a difficult recipe, but it has more details than the Herbes de Provence turkey, including steps for making a stock, cooking the turkey, and making an awesome gravy to go with it.
Important note: This recipe will easily work in the oven or in a gas or charcoal grill.
Since the recipe has resided for several years on “The Naked Whiz” blog, there’s really no reason for me to duplicate it here. Therefore I will provide a link to his site, which is loaded with well-respected resources including “classes and recipes”. So click here and I hope you enjoy this turkey recipe as much as we do. The Naked Whiz’s Blog.
Though most people think of serving turkey for Thanksgiving, it is also a popular holiday main course for Christmas and Easter. There are many ways to roast a turkey on a Big Green Egg (BGE) and I have tried several of them. I have settled on two recipes that our family likes best and I will present the first of these in this blog today. (This recipe can also be used on a turkey cooked in a charcoal or gas grill or an oven and is Ideal Protein, Phase 1 compliant). First I must go over the 8 “Rules of Turkey Cooking”:
Rule #1:The Turkey I purchase a fresh (never frozen) turkey whenever I can. These are a little more expensive and can usually be found at The Fresh Market or non-grocery butcher shops. They will often NOT be injected with sodium and water and will not be self-brining. If one purchases a grocery store turkey (Butterball, etc), check the labelling, as it will likely be injected with 3-8% solution. It keeps the turkey moist when cooked in a hot, dry oven, but remember when cooking in the awesome, moisture-retaining BGE it will not need to be brined. (That said, some BGE owners insist on brining their turkeys, usually to infuse added flavors before cooking it in the Egg, but occasionally it’s because they just don’t understand their Egg’s properties).
Rule #2:Practice run One needs to know if their plan will work (fit) on the Egg. I put all the components into the Egg, including the bird (frozen or fresh – still in the plastic wrapper) to be sure the pans will fit and it will close properly with the bird in place. I often have to modify my original plan based on this practice run – change from upright roaster to roasting pan or adjust grid heights to accommodate the drip pan or a large bird. I have even removed the fire ring and lowered the PS to the top of the fire box (4 inches deeper) to get a large turkey upright. I could easily touch the bird through the top opening!
Rule #3:Thaw thoroughly – with a frozen turkey, remember it will take at least 2, sometimes 3 days to fully thaw it in a refrigerator, so plan accordingly.
Rule #4Separate the skinThis is not a requirement on every turkey cook, but many recipes for turkey, and well as chicken, will instruct one to use a wooden spoon handle or, my preference, fingers to carefully undermine the breast, thigh and leg skin (try NOT to create a hole in the skin). This serves two purposes: (1) it allows one to add butter, olive oil, rubs or herbs under the skin for flavor, and (2) it also helps crisp up the skin when cooking.
Rule #5:Room temperatureAlways place the turkey on the counter and allow it to approach room temperature before placing in the BGE (or oven). This can range from one hour for a small bird to 2 hours for a very large one.
Rule #6:Chill the breast A perfectly cooked turkey (or chicken) will be done when the internal temperature of the breast is 160-165*, yet the legs and thighs should be 170-180*. I fill a gallon-size ziplock bag with crushed ice and place it on top of the breast about 20-30 minutes prior to placing the turkey in the Egg. By chilling the breast meat, it takes the breast longer to reach its done temperature, allowing time for the thighs to reach 180* (works for oven-cooked turkeys, also).
Rule #7:Don’t forget the giblets! Don’t forget there is a neck and a bag of giblets stuffed inside the cavity of the bird. Make sure it is completely removed!
Rule #8:Estimated cook time I have kept records of my cook times and Egg’d turkeys seem to average roughly 8-10 minutes per pound at 325-350* dome temperature. This is shorter than what most people expect, but remember, the BGE is essentially a convection cooker. With recipes that involve stuffing fruit and/or vegetables inside the cavity, the cook time will be longer – more like 15-20 minutes per pound.
Herbes de Provence Turkey
The first and simplest of my turkey recipes I learned from my former colleague and his gracious wife – Barry & Carolyn Aden. This gives a nice, browned turkey with a pleasant herbal flavor.
I use a herb paste made from olive oil mixed with Herbes de Provence and kosher salt. This paste is rubbed under the skin of the breasts, thighs and legs plus the outside and cavity of the turkey. To give it a short dry brine and let the flavors soak into the meat, it is covered with plastic wrap and refrigerated several hours or even overnight.
Prepare the BGE for an indirect cook with a drip pan and a dome temp of 325-350*. Place the platesetter (PS) with the legs up. Put some spacers (3-4 small balls of aluminum foil will work) on the PS, then a drip pan on the spacers (the air gap between the drip pan and the PS helps prevent the drippings from burning). The turkey can be placed on an upright roaster or in a V-rack (or roasting pan). The best smoking woods are mild fruit woods like apple, pecan or cherry (poultry soaksup smoke, so don’t overdo it).
Turkey on an upright roaster
Once the Egg has stabilized (with the PS and the drip pan) at your goal temp of 325-350* for about 45 minutes, place the turkey inside and insert a continuous-read thermometer (see “thermometers” in The Basics) into the thigh, avoiding contact with the bone. Baste occasionally with paste diluted with white vinegar. When the breast begins to brown, tent it with a loose piece of aluminum foil until about the last hour, when you can remove it and let the breast brown up nicely. Remove the bird when it’s done, cover and rest it on a cutting board until time to carve and serve.
Enjoy,
Misippi Egger
(Clark Ethridge)
Serves 10-12
Ingredients: 1 12# fresh turkey 3 tbsp Herbes de Provence (more, if needed) 4 tbsp EVOO (more, if needed) 1 tbsp Coarse sea salt, or Kosher 2 oz White vinegar
Instructions: Herb Paste: (1) Mix EVOO and Herbes de Provence and salt to make a thick paste. Reserve the remaining paste and mix it with the white vinegar to make a baste for later (or remake a smaller quantity for basting). Prep of turkey: (1) Pat the turkey dry. Undermine the skin with fingers or the handle of a wooden spoon, beginning at the top of the breasts and undermining as far onto the thighs and drumsticks as possible, being careful not to tear holes in the skin. Generously rub the paste under the skin, then completely rub the outside of the turkey and the cavity with the paste. Lightly cover with plastic wrap and refrigerate several hours or overnight. (2) Allow the turkey to come to room temperature before putting on the grill (about a hour). During the last 20-30 min. of this time, place a gallon bag with crushed ice over the breasts to keep them cooler than the dark meat. The Cook: (1) Fill the BGE up with lump to within about 1″ of the bottom of the platesetter. Get it stabilized at about 325-350* with the platesetter in place and the legs up (may need to remove the fire ring if turkey is 20# or so). Mix some pecan or apple chips/chunks in with the lump. (2) Place turkey on a vertical roaster in a drip pan, a V-rack over a drip pan, or in a roaster/rack pan and cook until thigh temp is 180* (the breast should be about 160*). Cover and rest until time to serve.